Self-Publishing Tips (Part 1) – Preparing the Manuscript
In an early post, I provided several tips for taking an active role in preserving local history. One way to preserve local history is to write a book. In 2009, I initiated the Union High History Project to preserve the history of Union High School in Caroline County, Virginia. The end product of the project was a book that preserved the history of the school and the memories of the people who were associated with the school.
I decided to self-publish the book because I wanted creative control. I researched numerous self-publishing companies and narrowed the list down to CreateSpace and LuLu.com. I selected CreateSpace because it was associated with Amazon.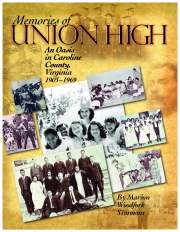
This was the first time I had every written a book and I had no idea what I was doing. I did a lot of research, made it up as I went along, made some mistakes and learned some valuable lessons.
I am happy to say I am pleased with the book. It is titled Memories of Union High: An Oasis in Caroline County, Virginia 1903-1969 and I have received a lot of positive feedback. The book uses remembrances from alumni, faculty, family and friends; excerpts from school newspapers and yearbooks; and over 100 photographs and other memorabilia to preserve the history of the school.
When people learn that I have self-published a book they often ask me for a few tips. Therefore, I decided to create a blog post to share what I learned from my experience with the Union High History Project. I have a lot of information to share, so I decided to divide it among several posts.
Originally, I decided to do all the work for the book myself. As I researched the book design process and began reading about editing, formatting, pagination, fonts etc. I quickly realized I did not have the skills to produce a professional quality document. Therefore, I decided to outsource the editing and design work. The end result of the book design process was two PDF files (one for the cover and another for the manuscript) which I uploaded to Createspace and printed. This process was much simpler and I recommend that you hire an editor and graphic designer. The final result is well worth the cost.
Here are some tips for preparing your manuscript for editing and layout before you hand over your manuscript to a professional to create the final product:
- Using a word processing software. Your manuscript should be created using either Microsoft Office or WordPerfect. Since Microsoft Word is the most popular word processing software I would suggest you use that.
- Decide on document layout (but don’t layout the book). When I was writing my book I inserted images, captions, text boxes, headers, and footers in the document. After I hired the editor I learned that I should not have done that, so I had to undo all that work. The positive aspect of me laying out the book was I had a clear vision of what I wanted the document to look like and could communicate my vision to the professionals. Even though you should not layout your book, you should have a general idea of what you want the book to look like.
- Format the document. The document should be double spaced with a clean, readable font such 12-point Times Roman. Use the same font throughout the document and do not format the text (e.g. no bold, italics, underline etc.). Use a left justified margin and indent the first line of each paragraph with a single tab. Use only one hard return between paragraphs. Do not use hard returns at the end of a sentence; let the text wrap naturally to the next line. Begin each chapter on a new page and give each chapter a title. Number every page.
- Decide on image placement. Images can be grouped together in one section (usually the center) or dispersed throughout the document. Grouping the photos in one location will help keep the cost down because it makes the graphic designer’s work easier. It also can save on printing cost if the images are color because that one section can be printed in color (which is more expensive than black and white) and the remaining sections of the book can be printed in black and white. In some instances it is more appropriate to spread the images throughout the document. In the case of Memories of Union High, photos and text boxes were positioned next to a person’s memory; therefore, the images were spread throughout the document.
- Ensure document has the proper sections. A book has three main parts: Front, Body and End. Each of these parts is comprised of various sections (some required and some optional).
- The front portion of the book consists of the following sections. Half-title page contains only the title of the book. Title page contains: book title; subtitle; author; collaborators and contributors; and publisher. Imprint Page contains the copyright notice, publisher contact information, Library of Congress Catalog Number (LCCN) and ISBN. (You will learn more about these items in a future post.) These sections are followed by the Dedication (optional), Table of Contents, Acknowledgements (optional), Author’s Notes (optional). The Foreword is optional and is usually written by someone other than the author. It explains why the reader should read the book. The Preface is optional and explains how the book came about.
- The body of the book is the main part and usually consists of the chapters including the introduction and conclusion.
- The back portion of the book consists of End notes, Appendix, Bibliography and Index. These sections are optional; however, if you are writing a local history book, I encourage you to at a minimum have end notes and a bibliography to document the sources for your information. The Appendix can be used to include supplemental information which may be of interest or use to the reader.
Memories of Union High contains three Appendices. The first appendix contains Principal Messages from the yearbooks. These messages added value to the book by providing insight into the principal’s thought process, but there was no place to include them in the main portion of the book. Therefore, I thought it was best to put the information in an Appendix.
The second Appendix contains a summary of historical events that took place during the time period covered by the book. Originally, I included explanations for these events in the main portion of the book. This made the flow of the book awkward and difficult to read. Additionally, the information was not necessary for people who were familiar with these historical events. Summarizing the information in the Appendix was the best place for the information because it allowed readers who needed the summary to review the information before reading the book.
The last appendix contained a list of all the Union High History Project Participants. Originally, I included this information in the acknowledgements section; however with over 100 participants the list was entirely to long. Therefore, I moved the information to an appendix.
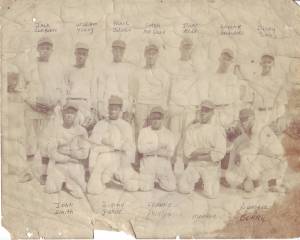
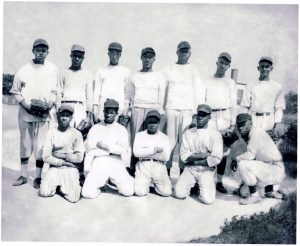
6. Ensure images are of good quality. It is important to have good quality photos to eliminate the need for the graphic designer to do extra work to correct problem areas which can greatly increase the cost of the graphic design work. Images should be of high quality (300 dpi or higher) and should be free of major flaws or blemishes. Poor quality or damaged images may require some restoration. If you are handy with graphic editing software such as Adobe Photoshop, you can repair the photographs yourself. Otherwise, it may be necessary to use the services of a person who specializes in photo restoration. I used Drew Klausner from pixlfixl.com and was very please with his prices and his work. He often gives discounts to repeat customers.
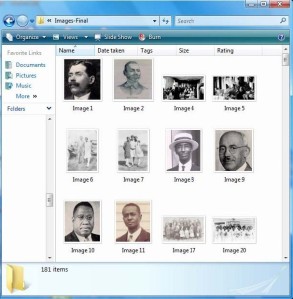
7. Create an image folder. Each image should be labeled sequentially (ex. image1, image2 etc.) and all the images should be placed in one folder.
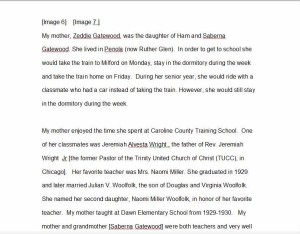
8. Insert image and text box place holders. A place holder such as [Image1], should be used to indicate where the image should be placed in the manuscript. The place holder should correspond to the filename for the image in the image folder. The text for the text box should be included in the manuscript. A place holder (ex. [textbox 3] )should be used to indicate the text to be included in a text box
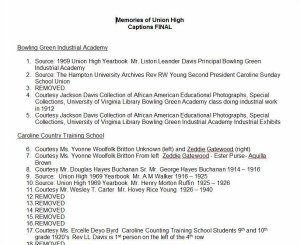
9. Create caption file. The caption file should be a sequentially numbered list and contain the text for the caption for each image or text box. (ex. Homecoming 1968 attendants, Miss Union High and Miss Football Sweetheart. Source: 1969 Union High Yearbook.) The number on the list should correspond to the number of the image or text box. Example, Item 1 on the list in the caption file is the caption for Image1 in the image folder.
10. Proofread the manuscript. You should meticulously proofread the manuscript before submitting it to the editor and graphic designer. This will greatly cut down on the number of revisions that are needed which will help keep the cost down. I suggest enlisting the help of a friend or family member with the task. (Just one person will do. Feedback from too many people will cause confusion.)
If you follow the above tips, your manuscript will be ready for editing and design by the appropriate professionals. The next blog posts will discuss selecting an editor and graphic designer, the editing and design process and how to obtain identifying information for your book.
If you have any questions about the information in this post feel free to submit a comment and I will reply.
Next Post: Self-Publishing Tips (Part 2) – Preparing to Hire an Editor and Designer
